make your own curling stones | make your own soccer goal | make your own hockey shooter tutor with beacon light | rink making forum | email us
This page provides do-it-yourself instructions for making your own backyard/frontyard rink with puck-stopping boards (and chickenwire)! There are more details about materials, dimensions etc. here than you might find on some other how-to rink web sites. The design is easily adapted. This site does NOT cover how to compensate for an UNlevel yard (an important considerations before starting). We now use a relatively unique liner method - we put it on the outside (see bottom).
Why make your own rink?
Because only a masochist would do so? We built one because we have a number of kids on our street and they love outdoor winter activities! Watch the movie below to see how much they love it. Turn the lights on at night and they are drawn to it like moths! Further, the project itself was fun and helped bring the neighbourhood - particularly four families - together. The size we could make is perfect for the kids to have a 2 v 2 game. For us bigger kids it is particularly good for shooting practice. We use orange foam pucks given where it is located...near cars, windows etc.
How we did it
In a nutshell, found a picture of a rink we liked on the web and we copied it.
|
|
|
|
|
Click image to see large version. |
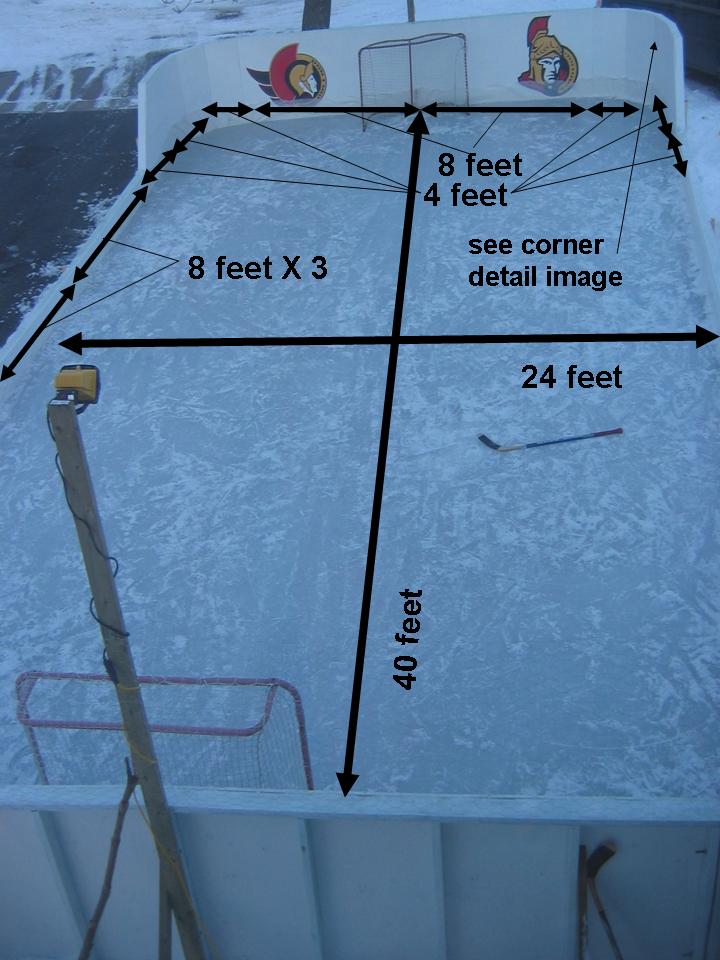
| Figure 1 (old) Dimensions |
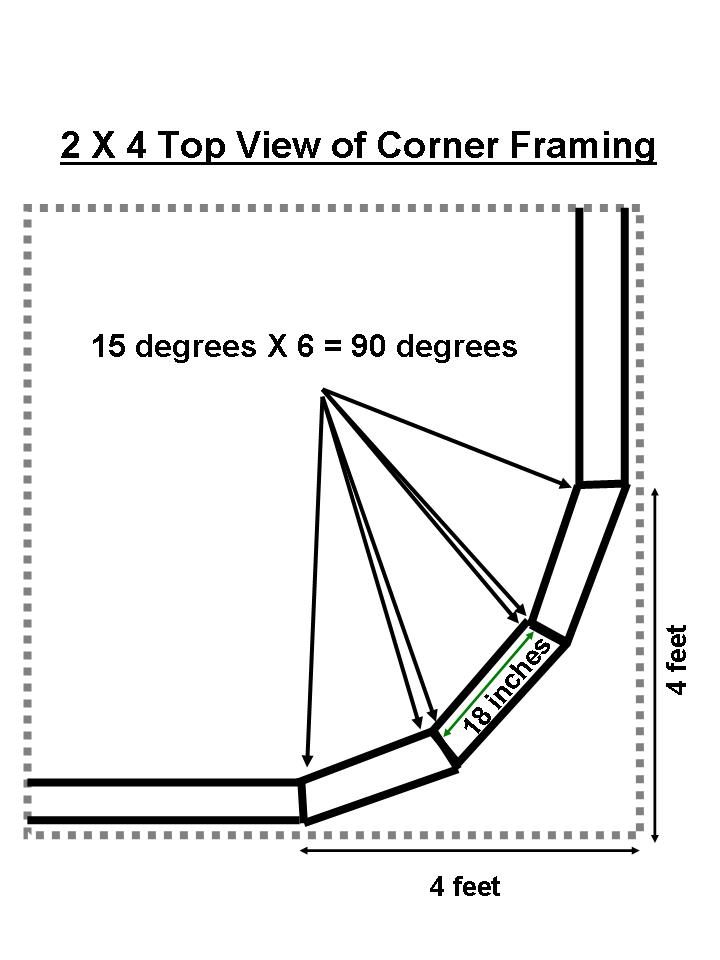
Figure 2 Corner detail |
Figure 3 Building corners |
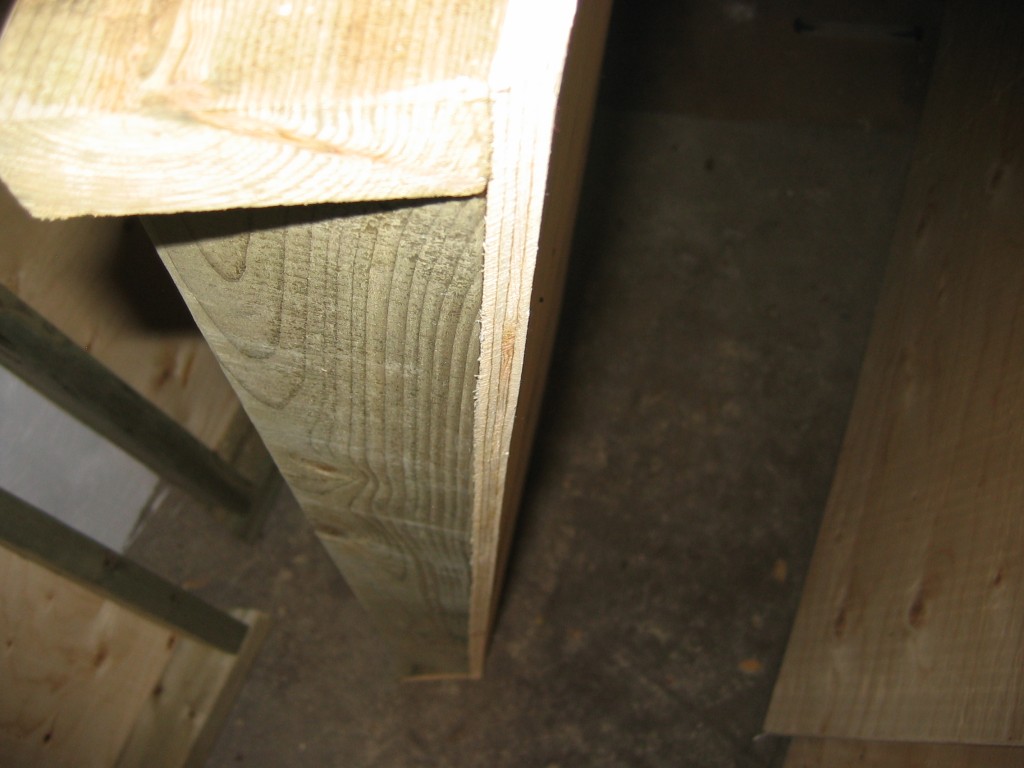
Figure 4 Corner angle cuts |
Figure 5 Completed corner |
For the cost of a new HD T.V....
| total cost (deluxe) | approx. $1300* | ||||||||||||||||||||||||||||||||||||||||||||||||||||||||||||||||||||||||||||||||
| total cost (econo) | approx. $550 | ||||||||||||||||||||||||||||||||||||||||||||||||||||||||||||||||||||||||||||||||
| build time | approx. 40 hrs (should go faster with plans below) | ||||||||||||||||||||||||||||||||||||||||||||||||||||||||||||||||||||||||||||||||
| materials
list (for 24'X40' rink) (rink is now 24' X 64') |
|
||||||||||||||||||||||||||||||||||||||||||||||||||||||||||||||||||||||||||||||||
| tools | - electric drill
- electric mitre saw - circular saw - glue gun - wrenches - robertson drill bit - 3/8" long drill bit - utility knife - safety goggles - lots of space to work - friends to help - drinks to bribe friends to help |
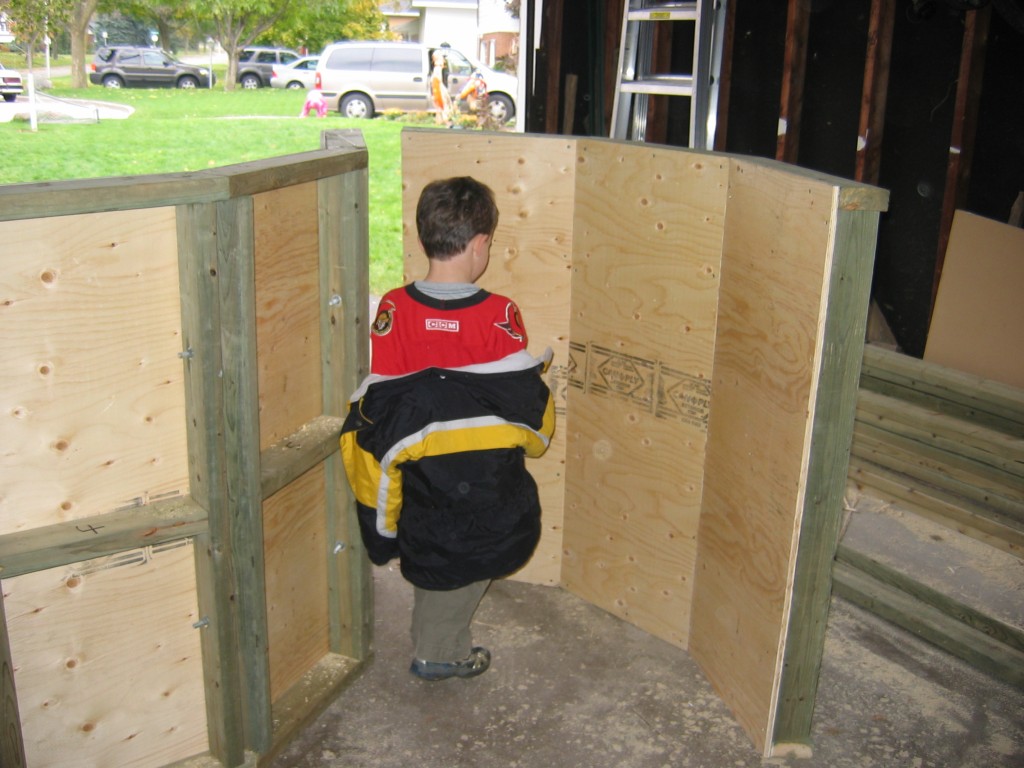
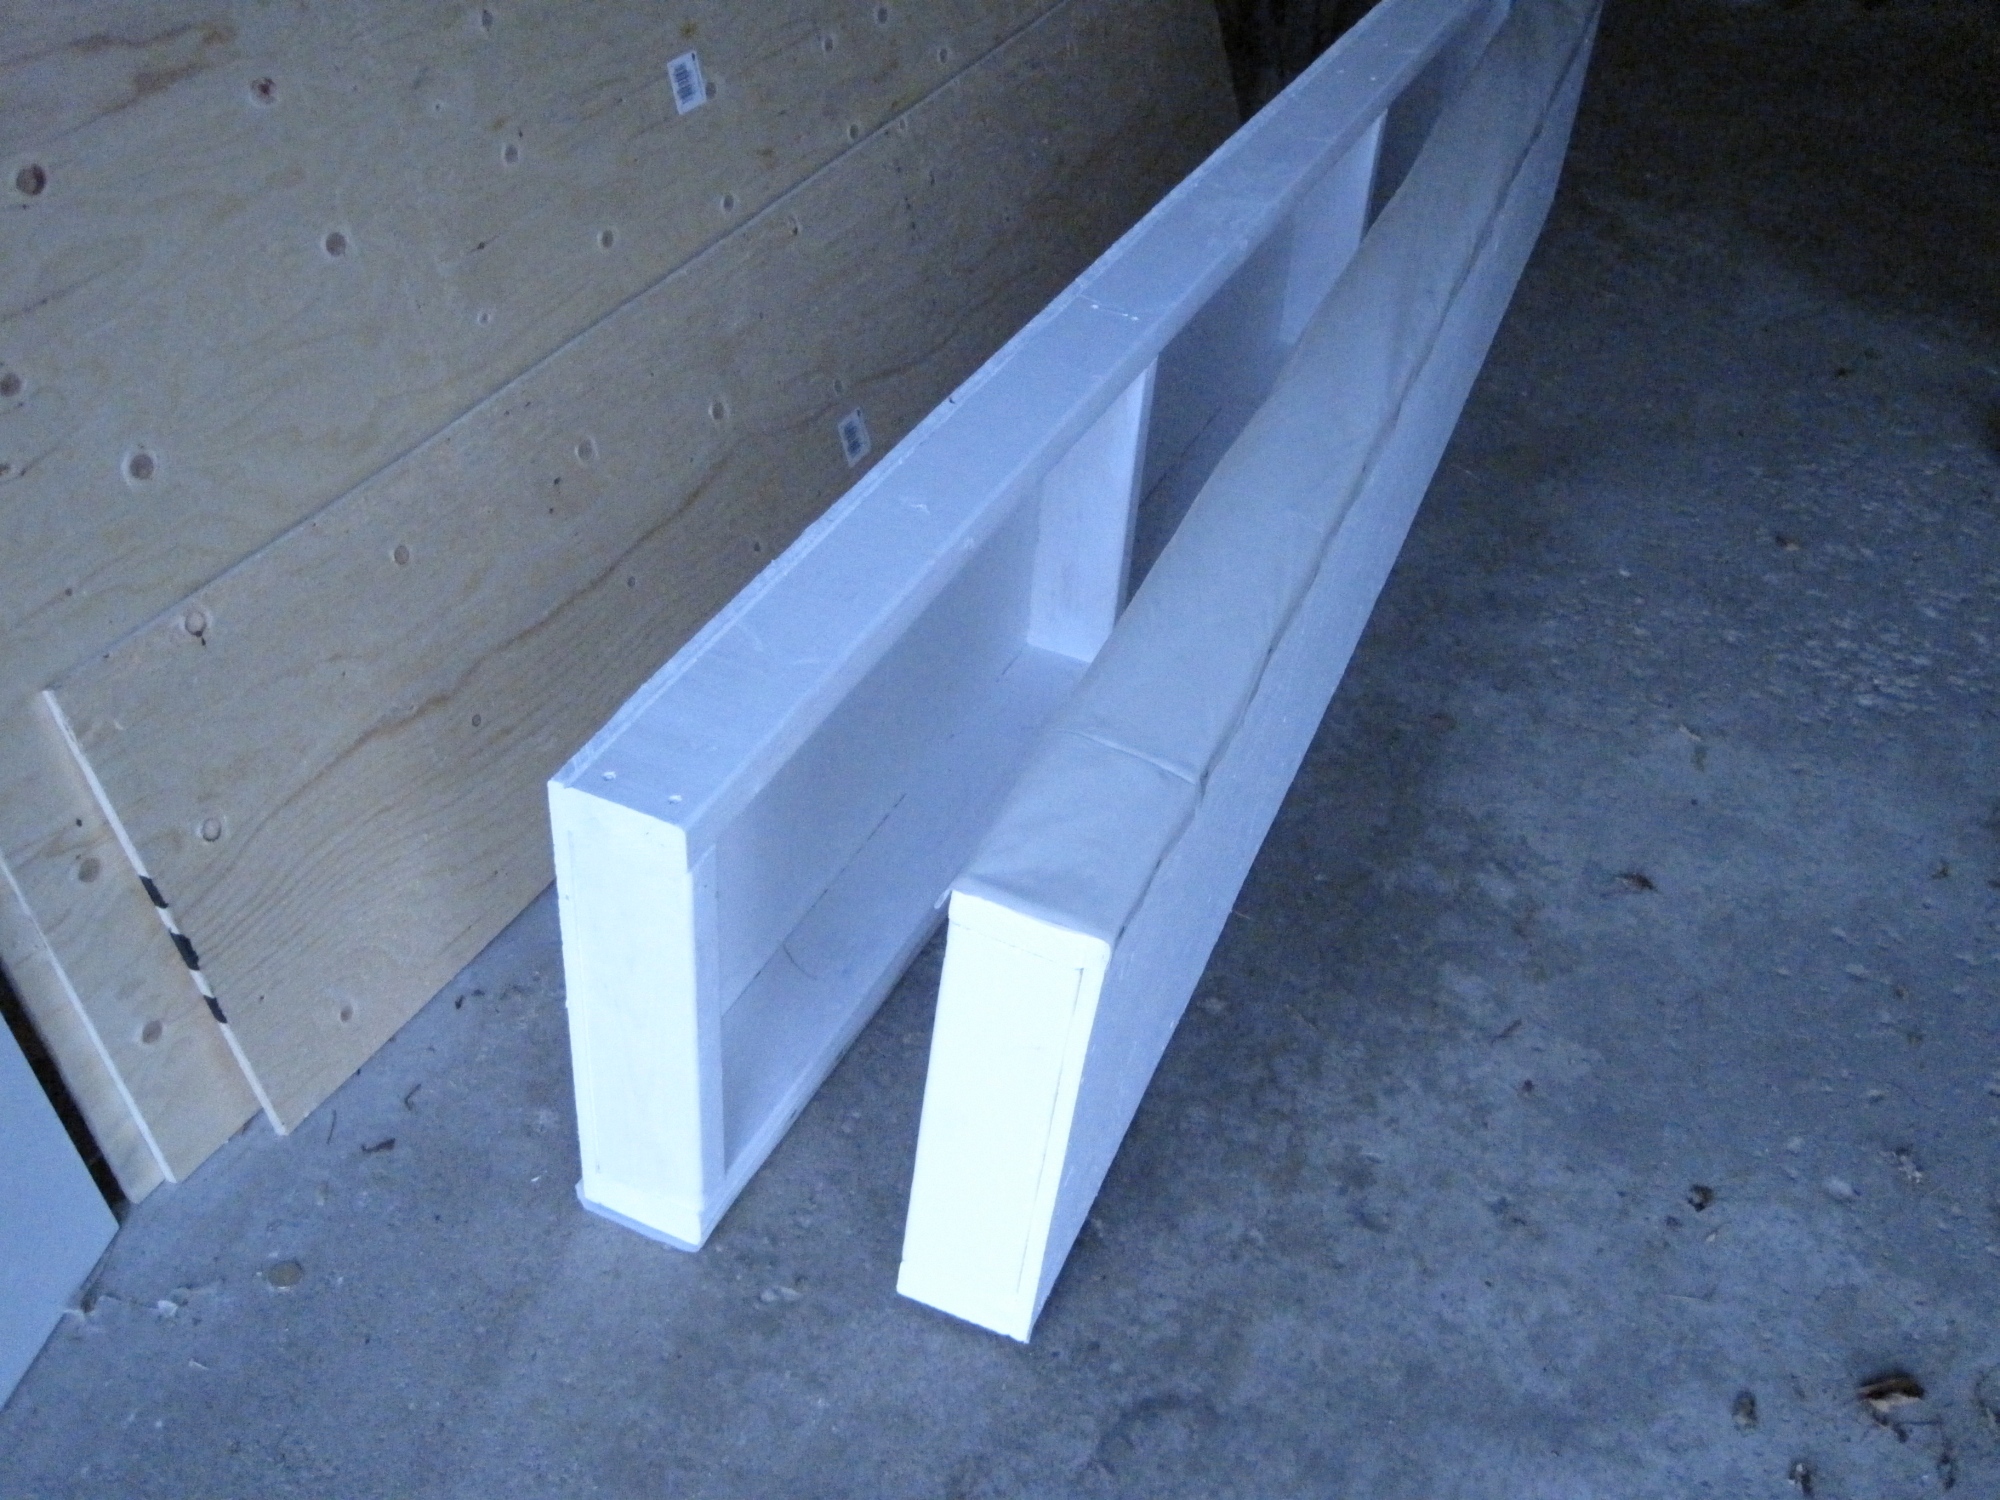
How to make ONE full corner (Figures 2-5)
The corners were tough to work out but we ended up with something that is in three pieces and assembles with only 4 bolts each season. Three pieces creates a corner that is a good tradeoff between "curviness" and build-time. Two pieces would help save considerable build-time. The magic angle is 15 degrees (see Figures 2 and 3). This creates a full 90 degree total angle on a 4 foot radius. The side and end boards that attach to the corner will NOT need angle cuts!
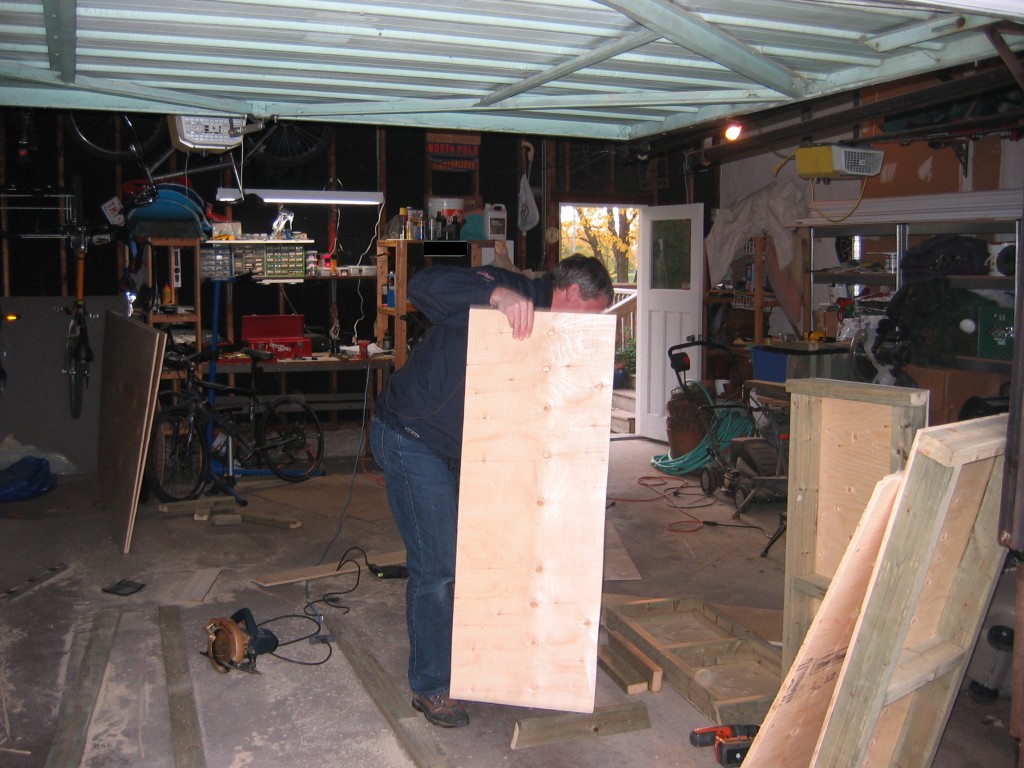
- Cut plywood on angle the panels are based on 18" X 4' where the plywood meets the 2" X 4" framing. Thus, the plywood face attached to the framing needs to be 18" and so does the "inside" framing itself. Rip the plywood to 18" (no angle) and then cut the 15 degree angle afterwards with circular saw. This means the inside edge of the plywood will be slightly less than 18" as a result. We did the cutting on the garage floor on top of a few 2X4s to keep the blade clear of the floor.i
- Cut corner framing (2X4) 18" wide (short side) at 15 degrees on BOTH ends (see Figure 2).
- Screw top and bottom framing to plywood use the 2" screws.
- Cut and attach vertical pieces (2X4) measure the distance between the top and bottom pieces you attached in the previous step. IMPORTANT - attach these vertical members flush to the plywood with NO angle cuts - this helps the bolts pull the corners nice and tight (see Figure 4)
- Cut and attach middle cross brace (2X4) measure and cut (measurement not always what it should be in theory - see Figure 5)
- Repeat the above steps to create three identical panels.
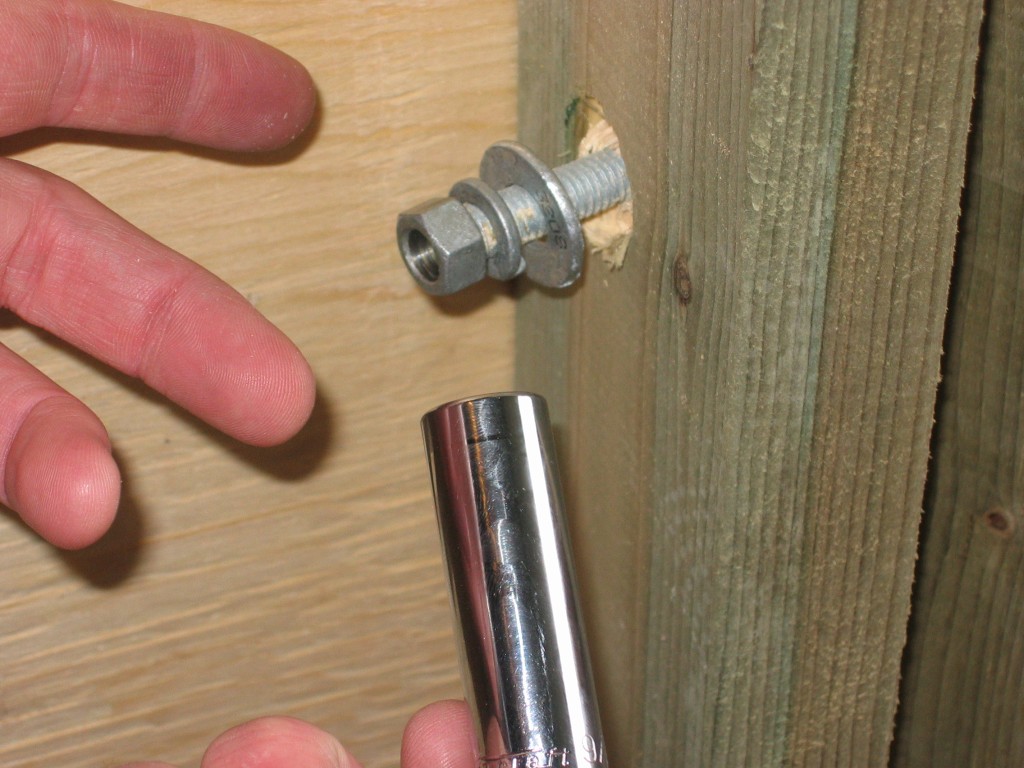
- Bolt panels together with long flat 3/8" drill bit make 4 holes then counter sink the nut side with a 1" flat bit (Figure 7). You may want to use a slightly bigger bit than 3/8" if you want to disassemble each corner at the end of the season for storage - to allow the bolt to move in and out freely.
|
|
|
|
|
Click image to see large version. |
| Figure
6 Transition panel |
Figure
7 Countersink for nuts |
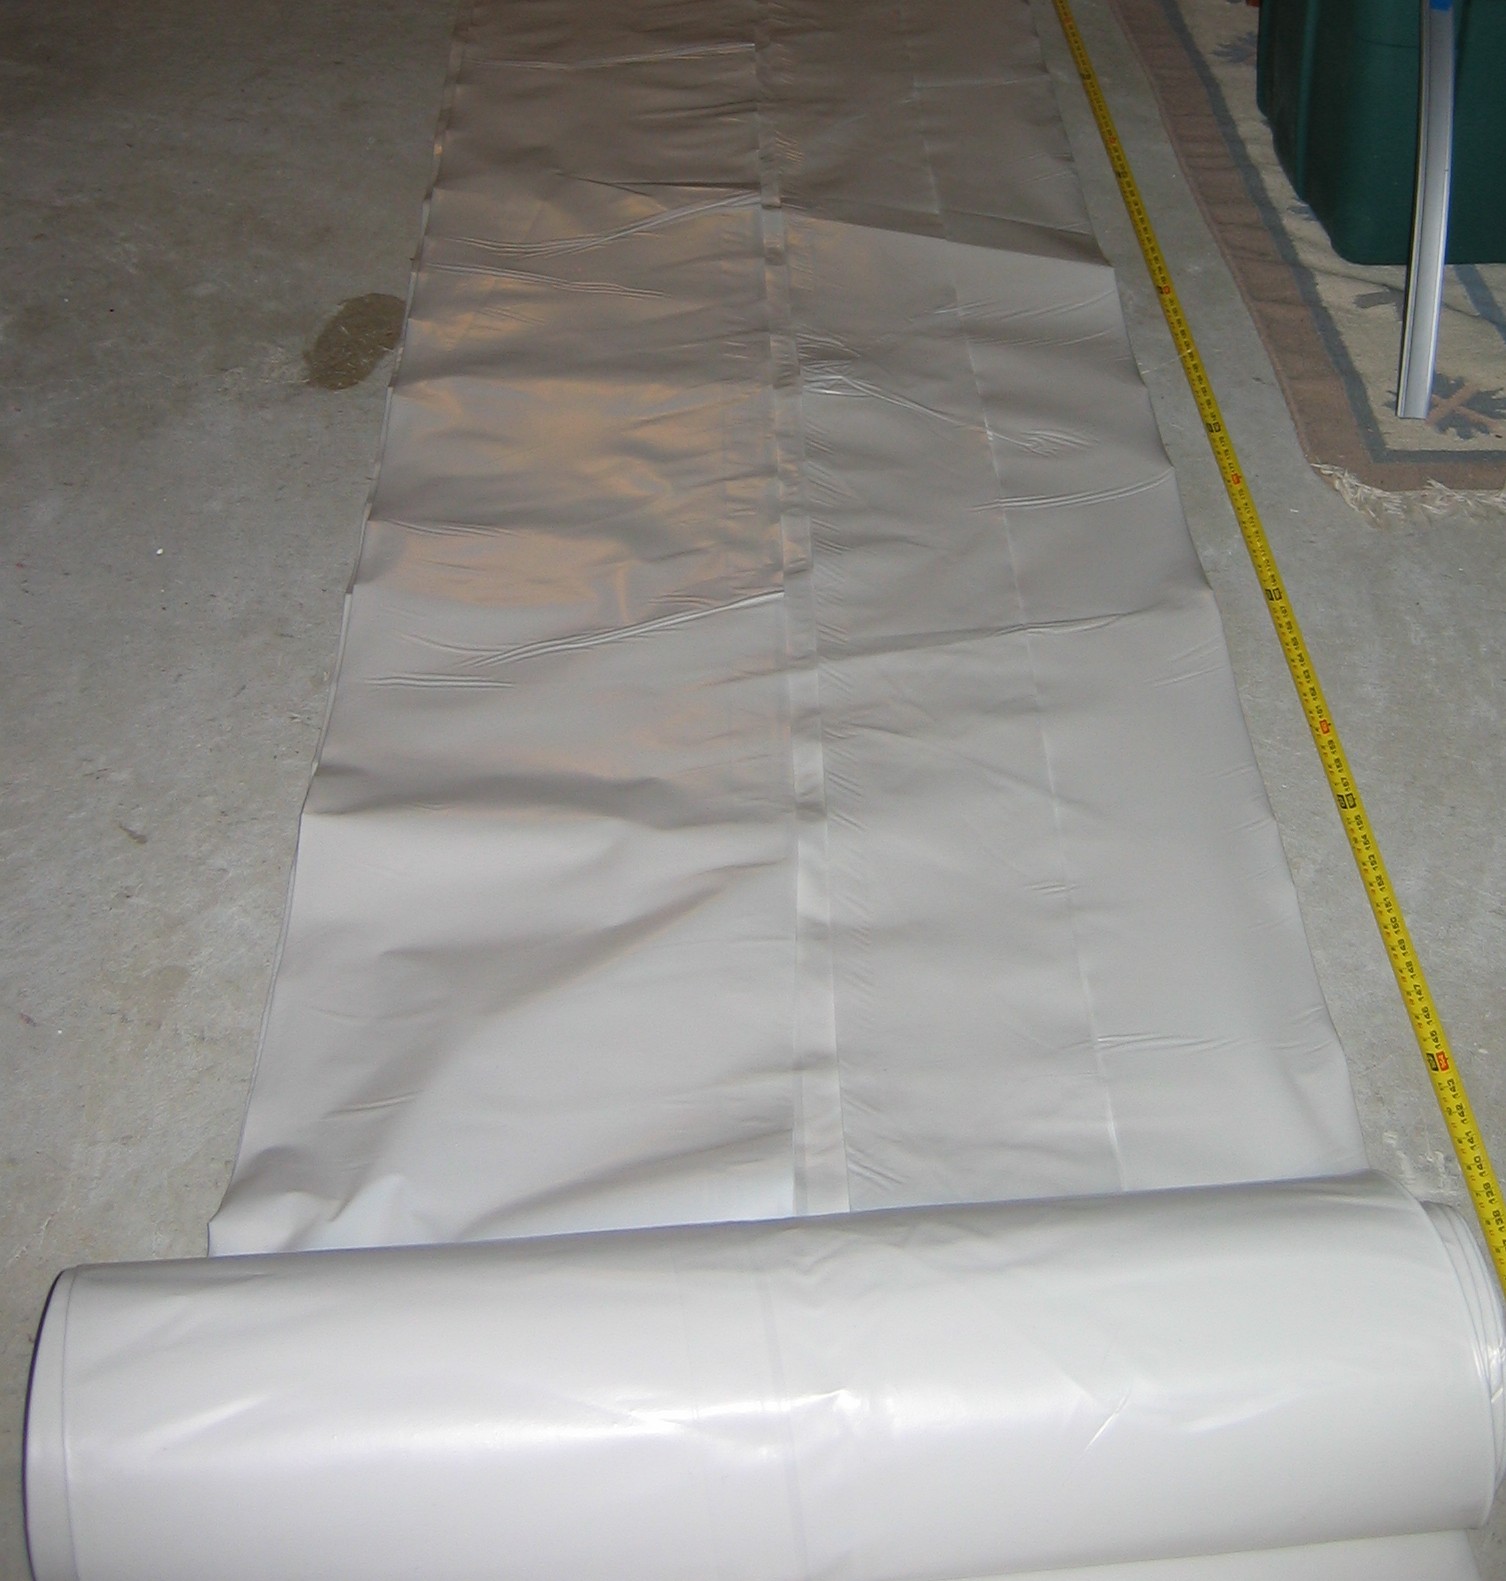
Figure 8 6 mil poly at least (I use 10 mil tarp now) |
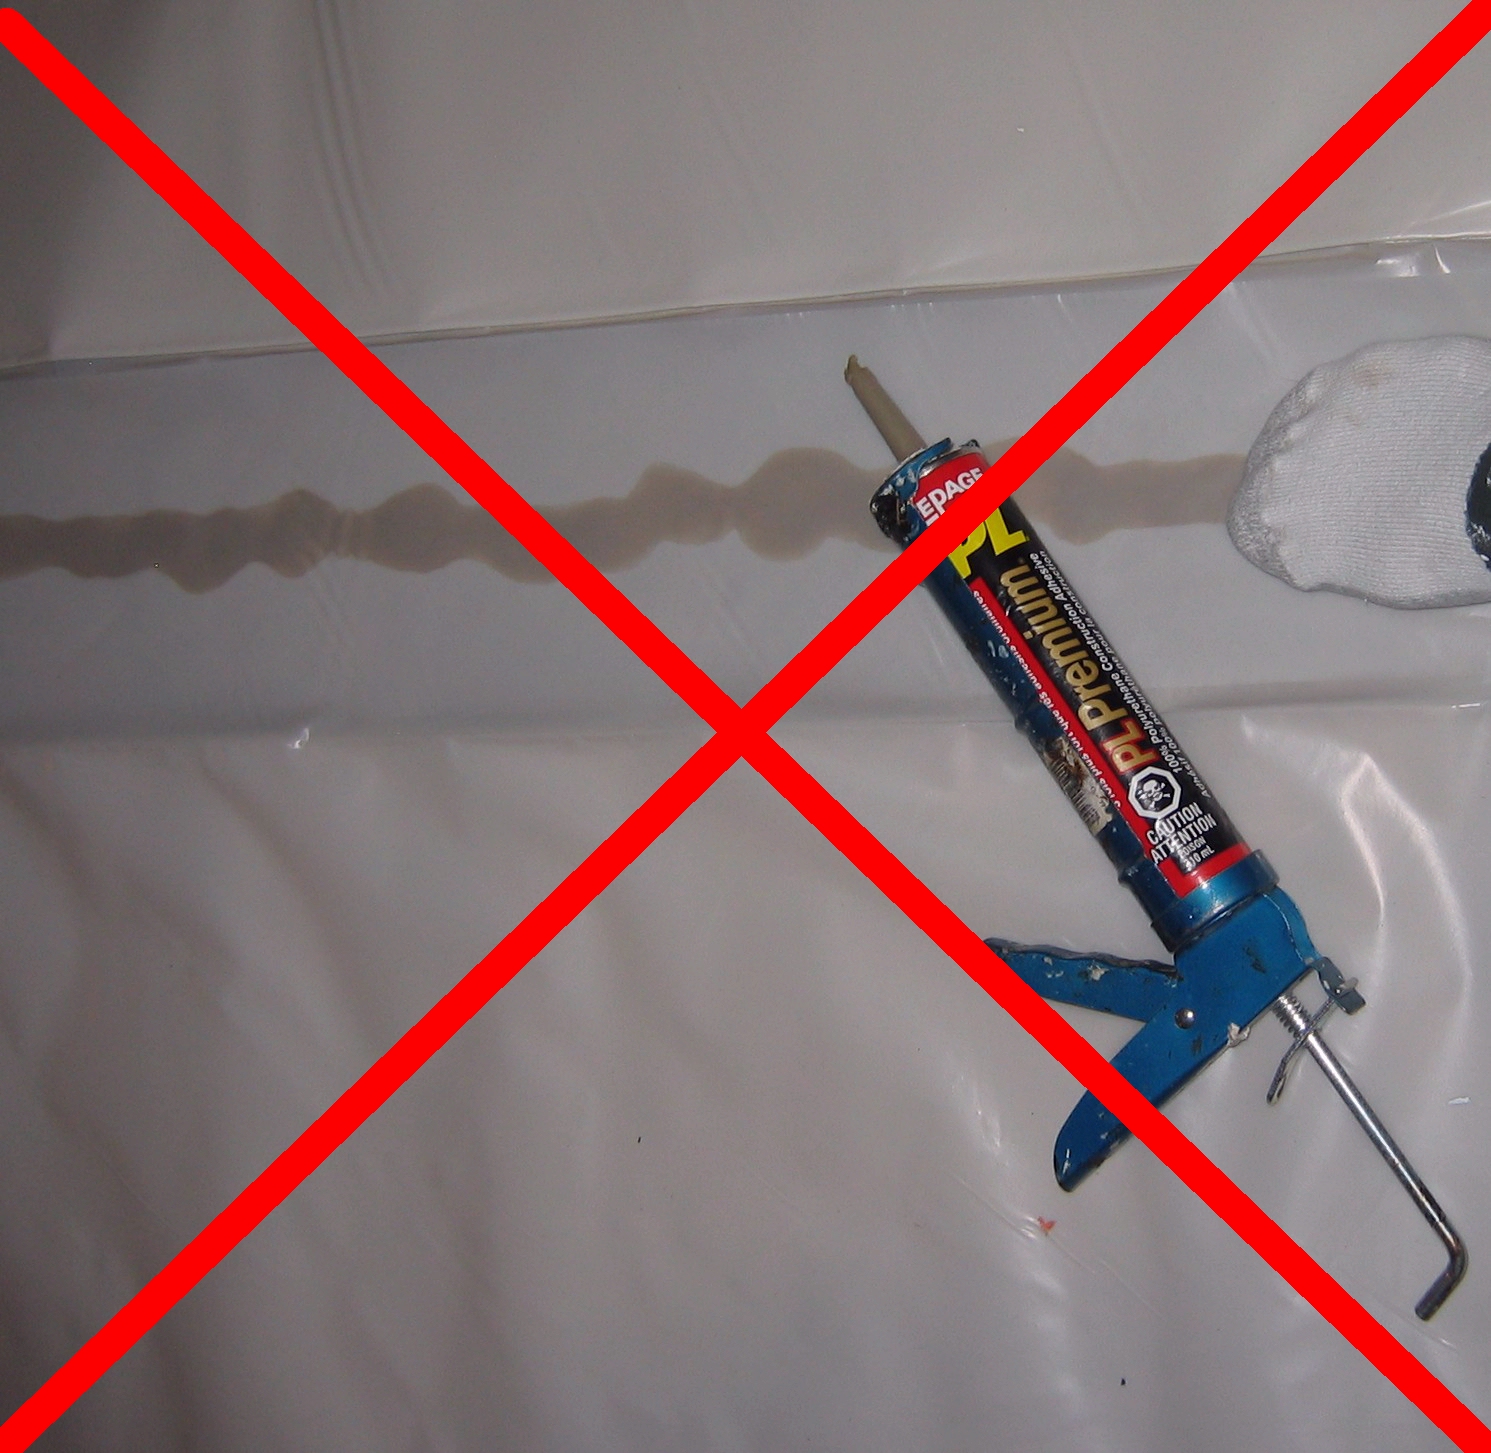
Figure 9 NO construction adhesive! |
Figure
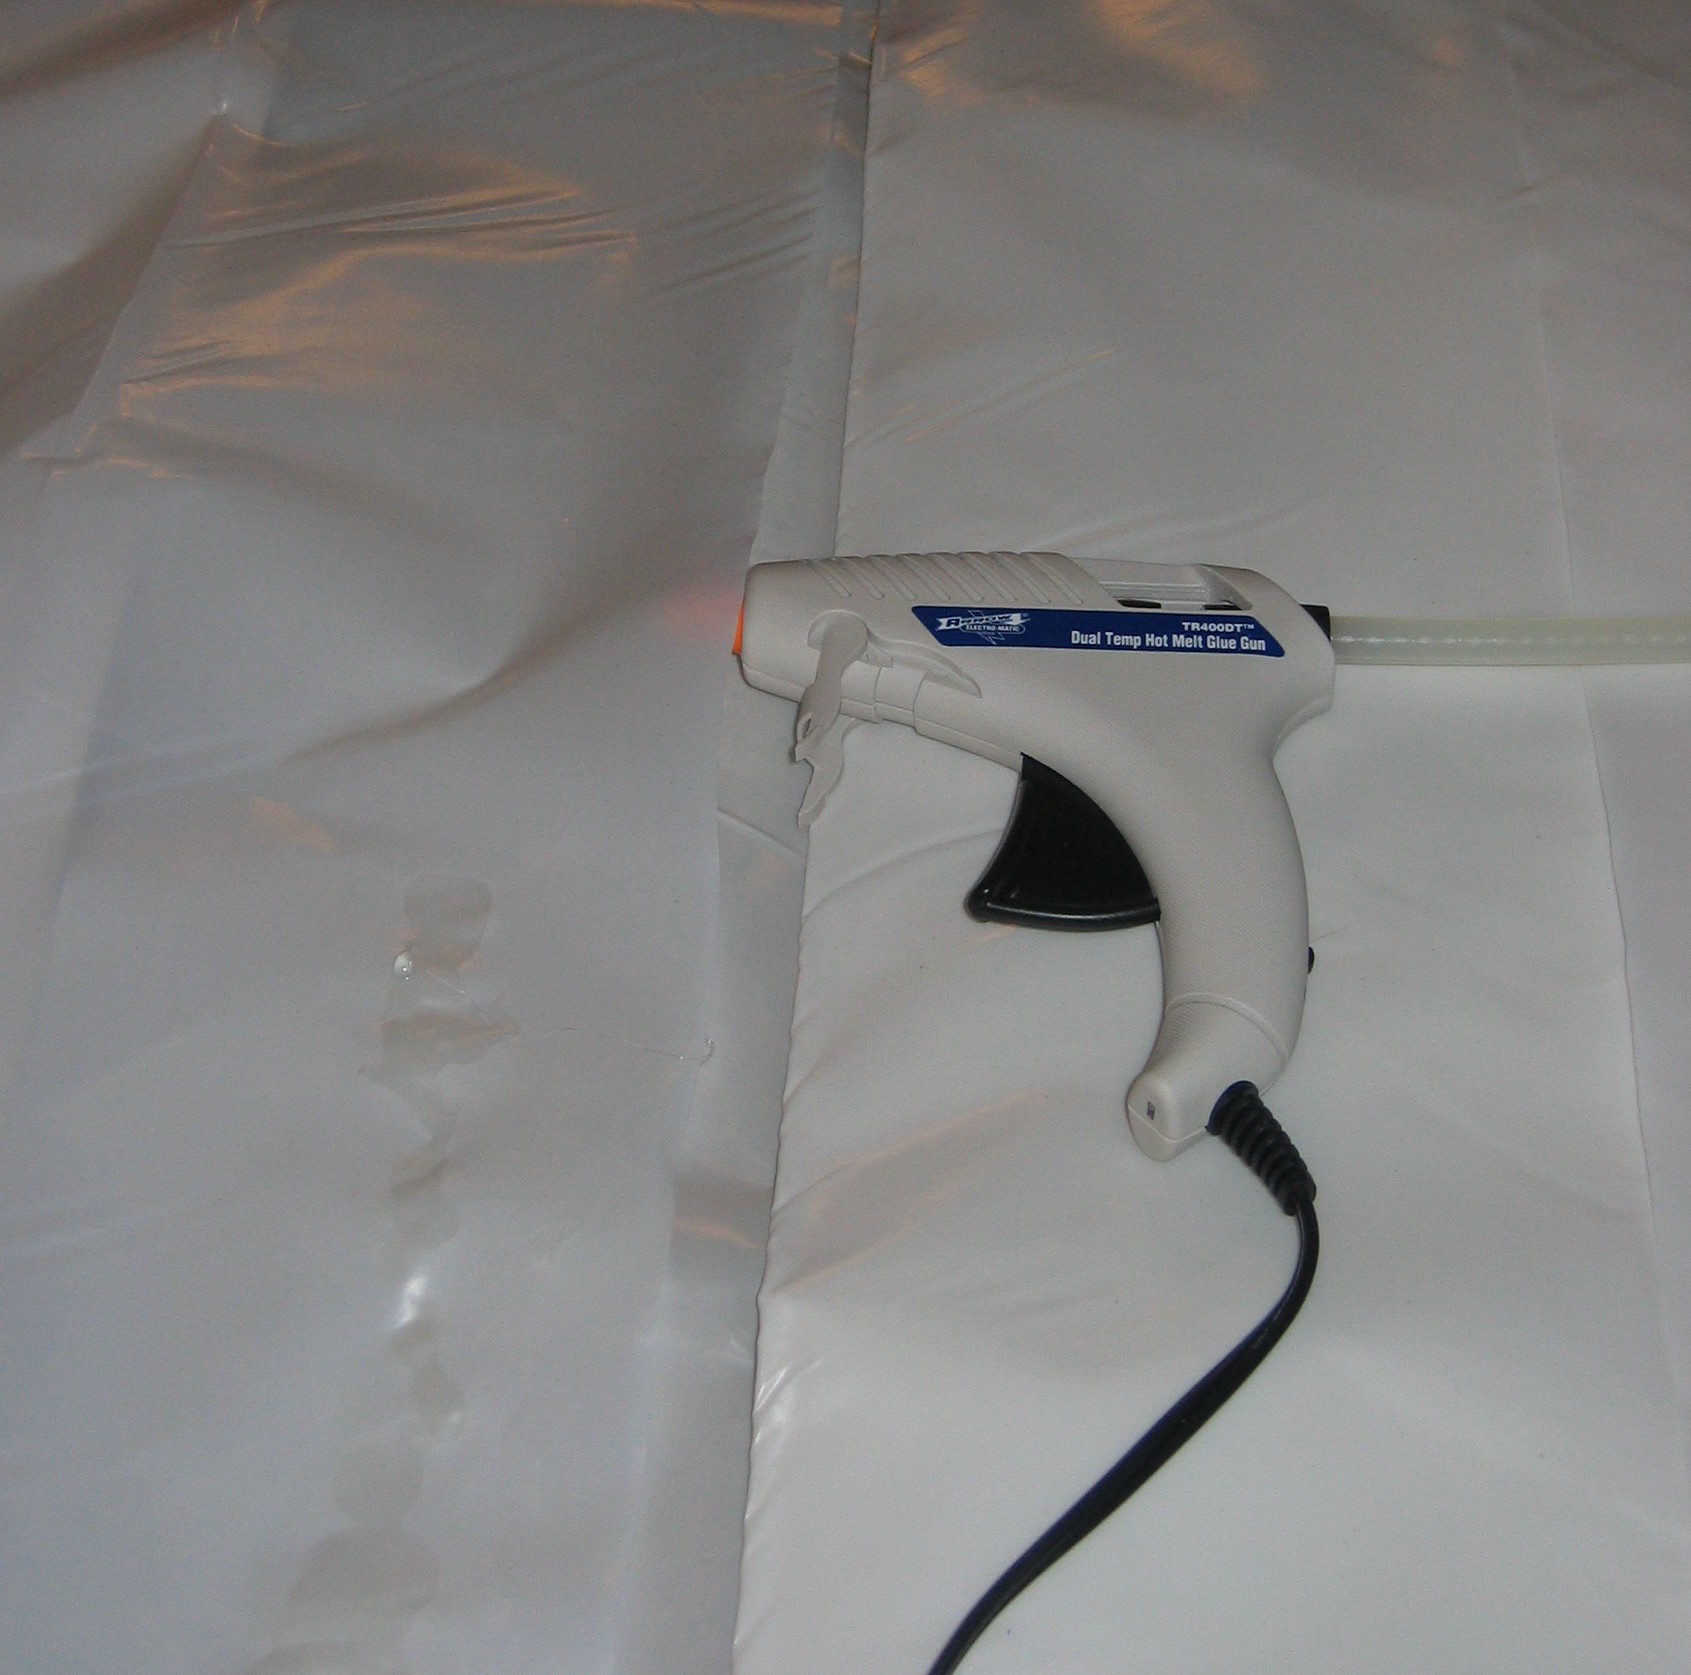
10 HOT glue or silicone seam |
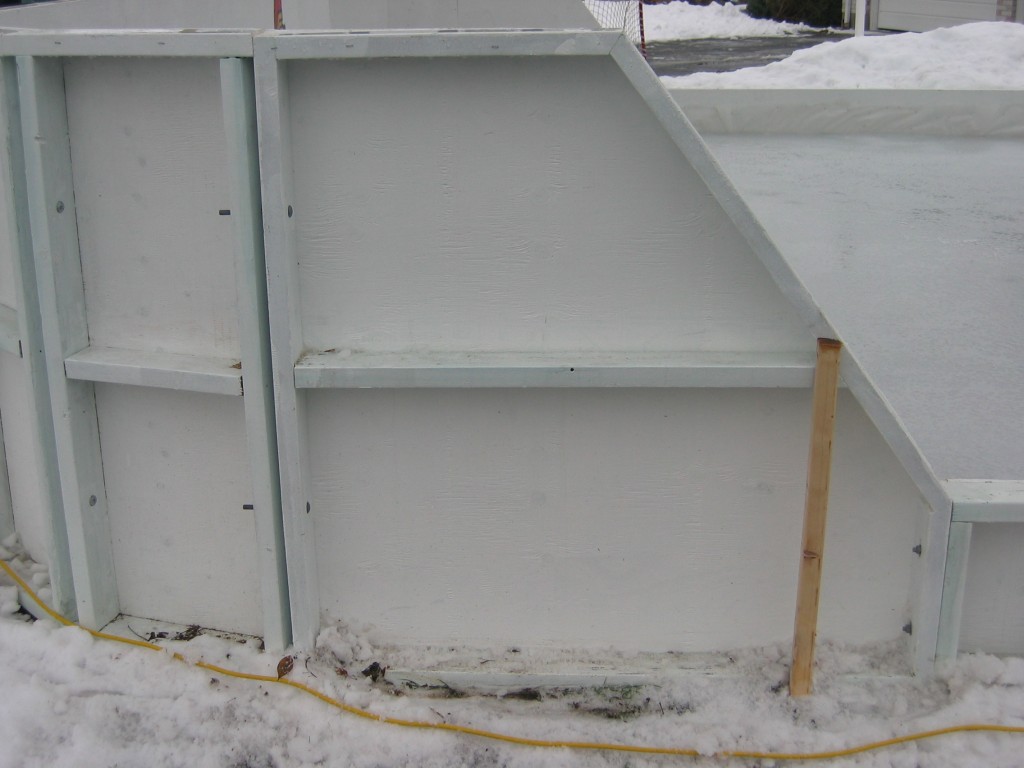
How to make the end and side panels (Figures 1, 6 and 14)
These are fairly straight forward. The ends are full 4' X 8' sheets of plywood framed on the backside. The sides are 16" X 8' (i.e. 3 per 4 X 8 sheet of plywood = less waste). Frame as you feel is appropriate - we used 2' centres. The transition panels that angle down from 4' down to the 16" were largely eyeballed and fudged. They are 4' long. We cannot tell you the exact angles of the framing (see "fudged" in previous sentence) but this can be done in numerous ways and it is not that difficult.
How to glue liner seam (Figures 8-11) (glue and duct tape)
UPDATE (2008-9)- We now use a thick 10 mil? tarp - the kind used on transport trailers. Has regular tarp plastic, backed with rubberized layer - and comes in 30' width (but costs about $400)! Hot glue gets brittle after a year, so good quality clear silicone is better for mending and seam seals that you want to last for longer. We patch our rink with silicone and small pieces cut from the corners of the tarp.
Our rink is based on the water-filled liner method (rather than the packed snow method). Since most poly plastic does NOT come in 30' widths a seam is typically required. I have tried a few methods in the past (e.g., silicone, construction adhesive) but the one here is the one that finally worked flawlessly. The method is not original, others use it too - but some recommend silicone and/or acoustical adhesive (this did not work for us). I managed to do the seam on a 20' X 10' patch of basement floor - with some rolling and and unrolling.
- Roll out liner to length allow for lots of overlap. Cut.
- Roll out second piece beside you may need to flip the roll so the edges match up properly for gluing
- Do NOT use construction adhesive as it does not dry. The PL Premium suggested to me and which lists plastic among the gluable surfaces (I think one still needs to be porous) never seemed to dry (see Figure 9)
- USE hot glue it dries very fast and holds well. Glue 2 feet at a time pressing the pieces together hard. Use lots of glue (see Figure 10)
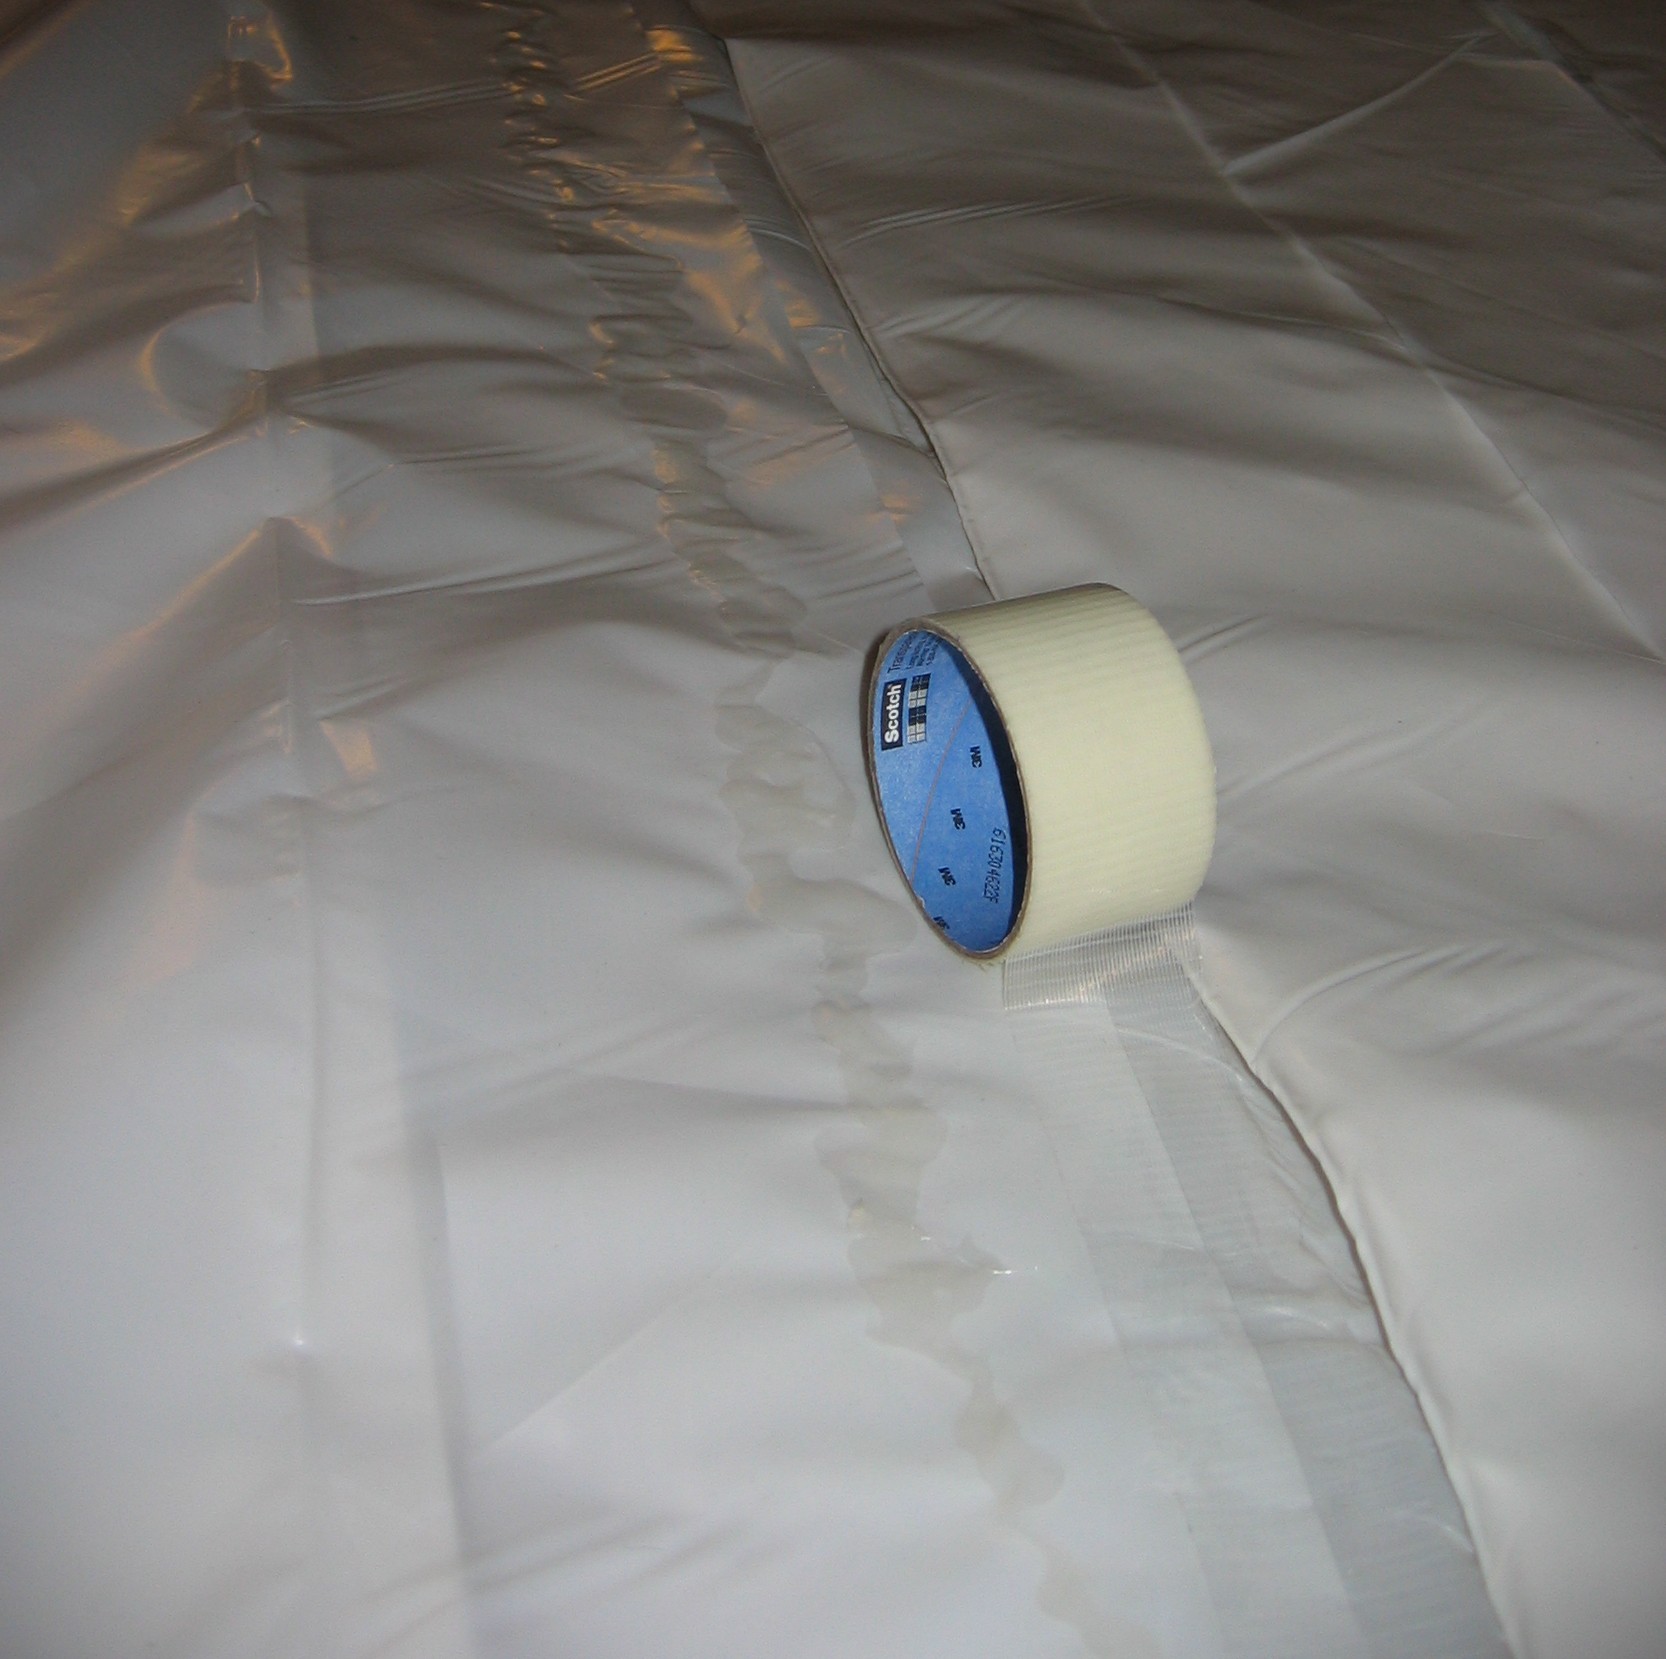
- Tape seams on both the bottom and the top. This is likely overkill, but for the $$ already spent, a few bucks for some duct tape seemed a good investment.
|
|
|
|
|
Click image to see large version OR movie. |
| Figure 11 Clear duct tape (insurance) |
Figure
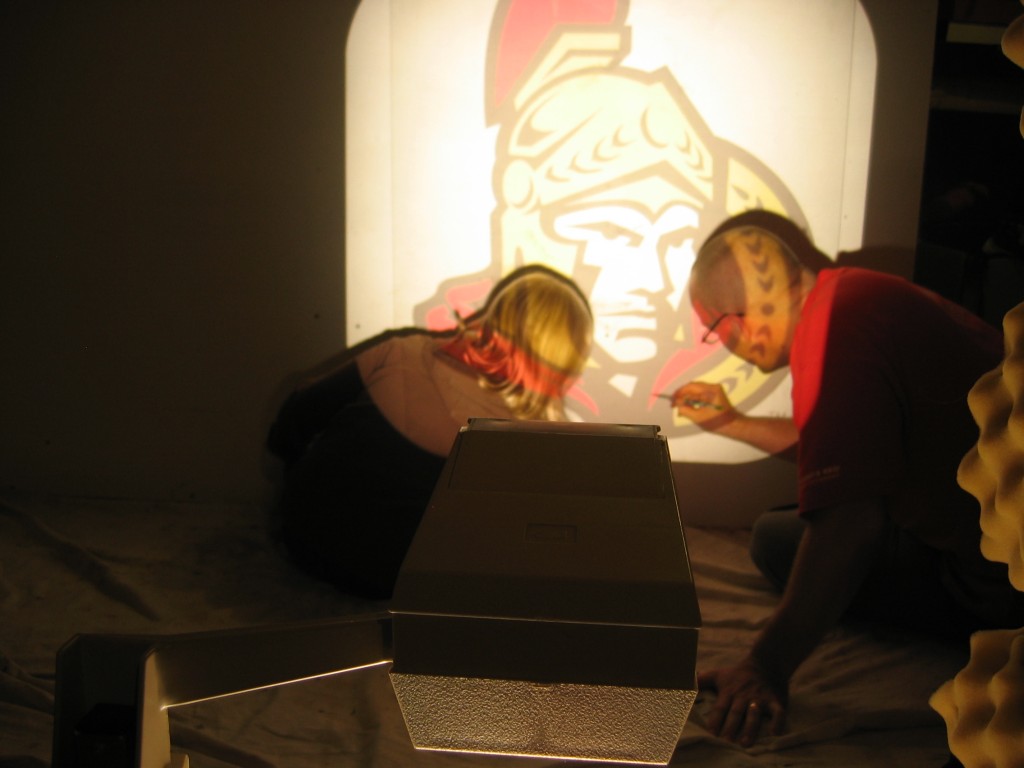
12 Overhead tracing |
Figure
13 Kids pitch in |
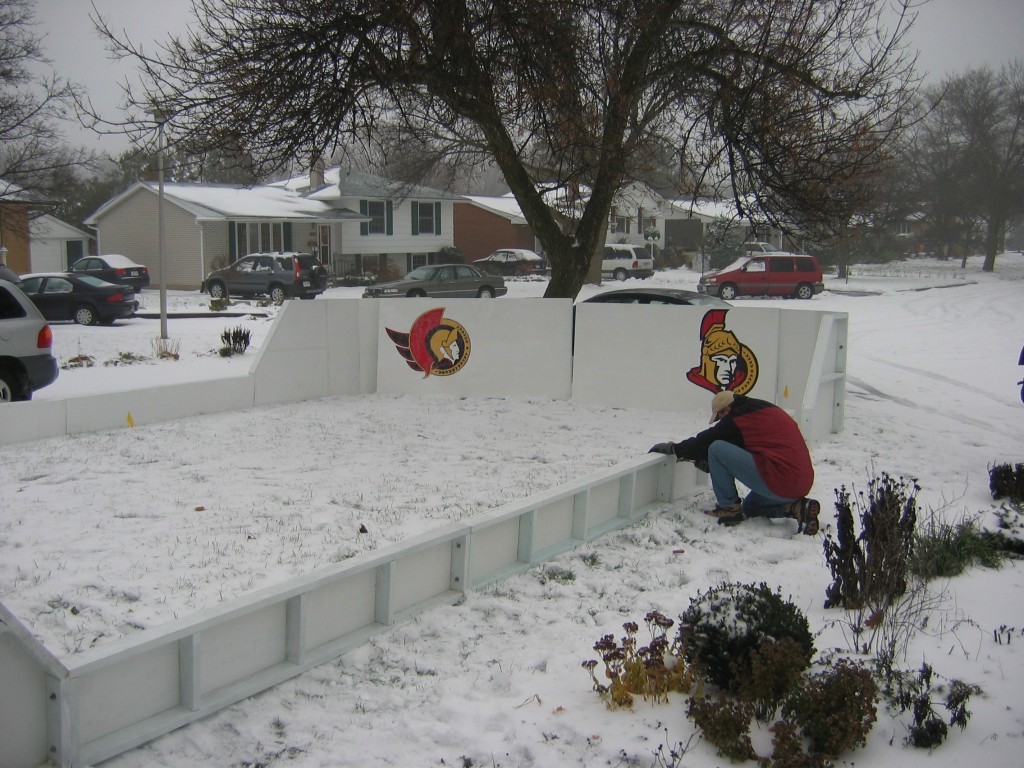
Figure
14 Final assembly |
Movie
1 Game on 2007! |
|
 |
 |
 |
 |
 |
|
| Figure 15 NEW, liner on outside |
Figure 16 Poly on bottom edge of boards protects liner |
Figure
17 Corner boards liner outside, screws at top not bottom |
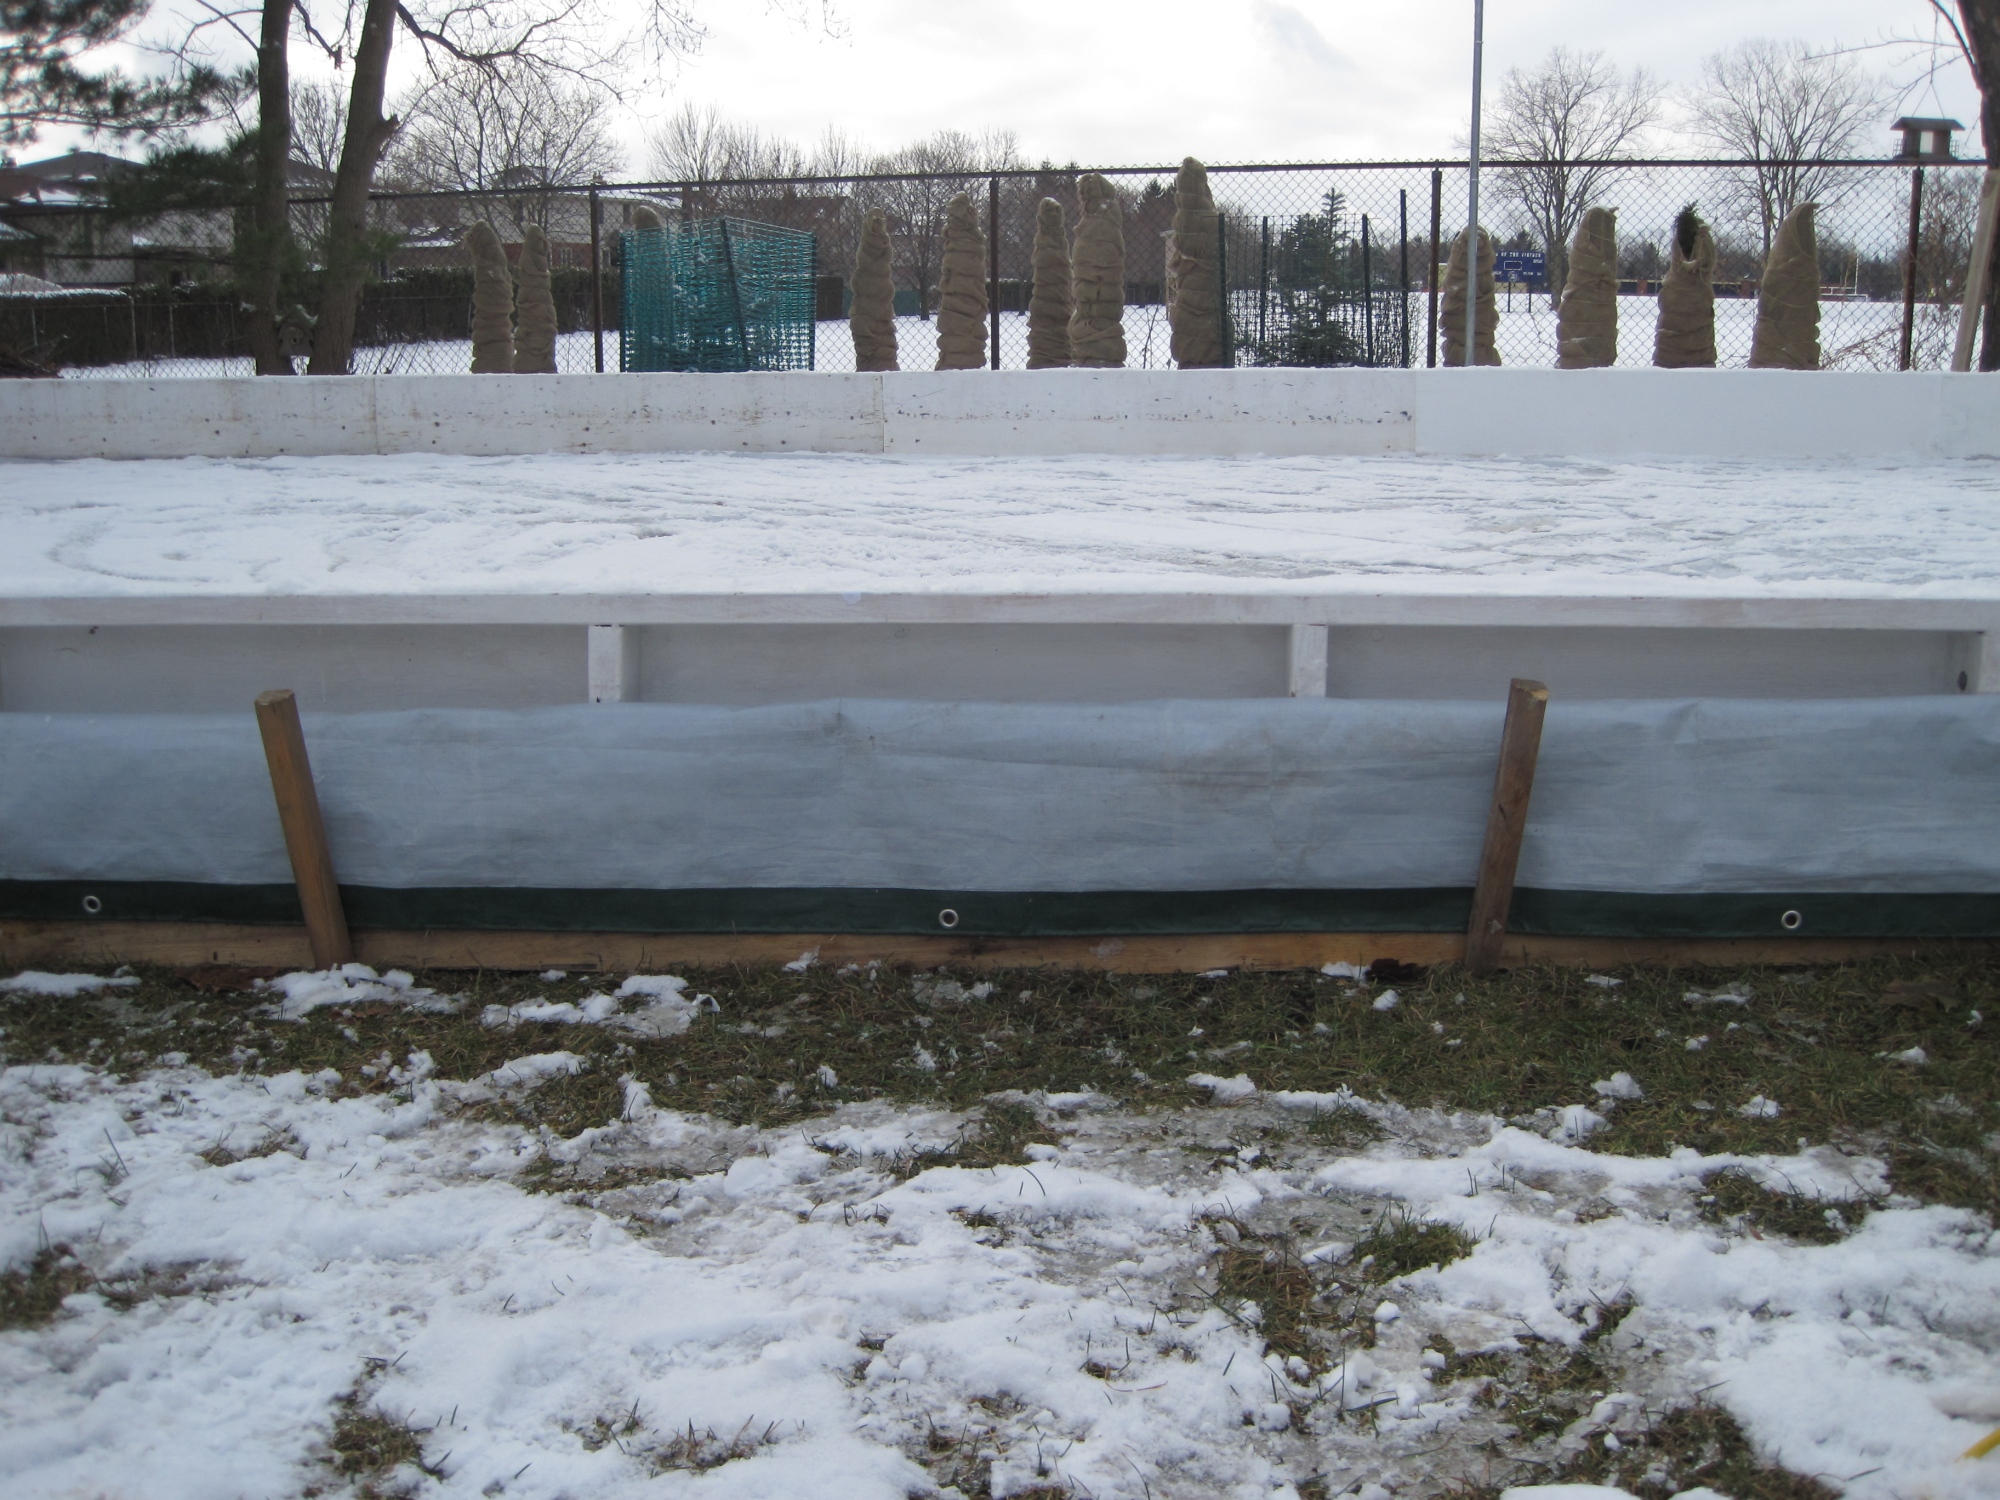
Figure
18 Side board with liner - dam boards hold in water. |
Movie 2 liner supported by plywood outside |
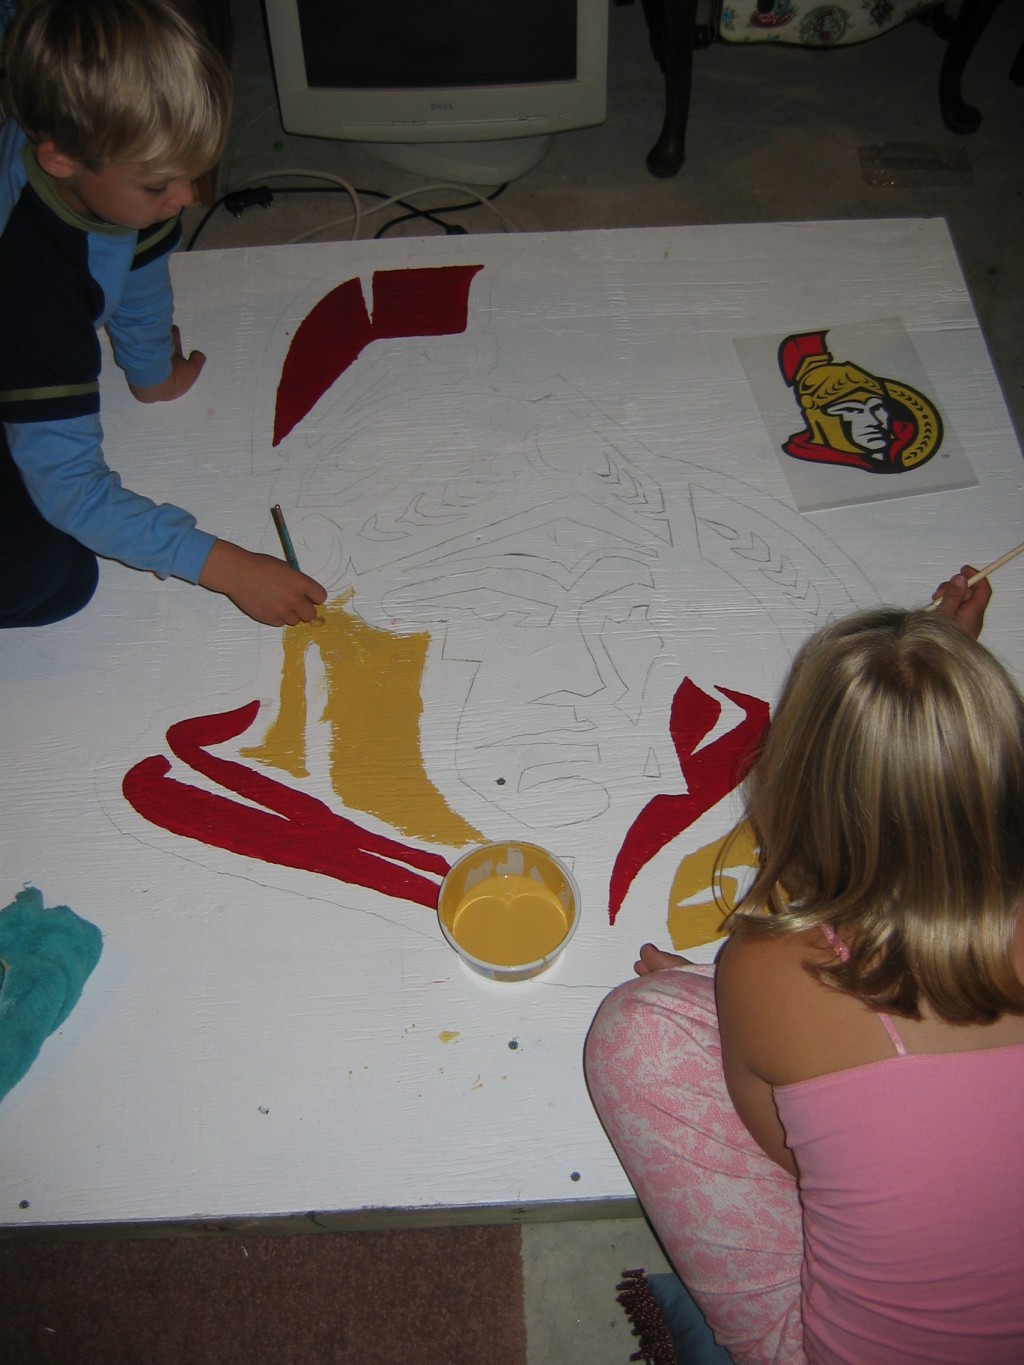
How to paint logos (Figures 12-13)
All of the painting took up about 60% of the total construction time but the kids loved the process. The photos are self-explanatory. We borrowed the overhead projector from one neighbour's work. A data projector would save steps if you have a computer close to where you need to project the image for tracing. Get/make logo on computer, print logo on overhead from office store, project logo on board, trace, paint by numbers.
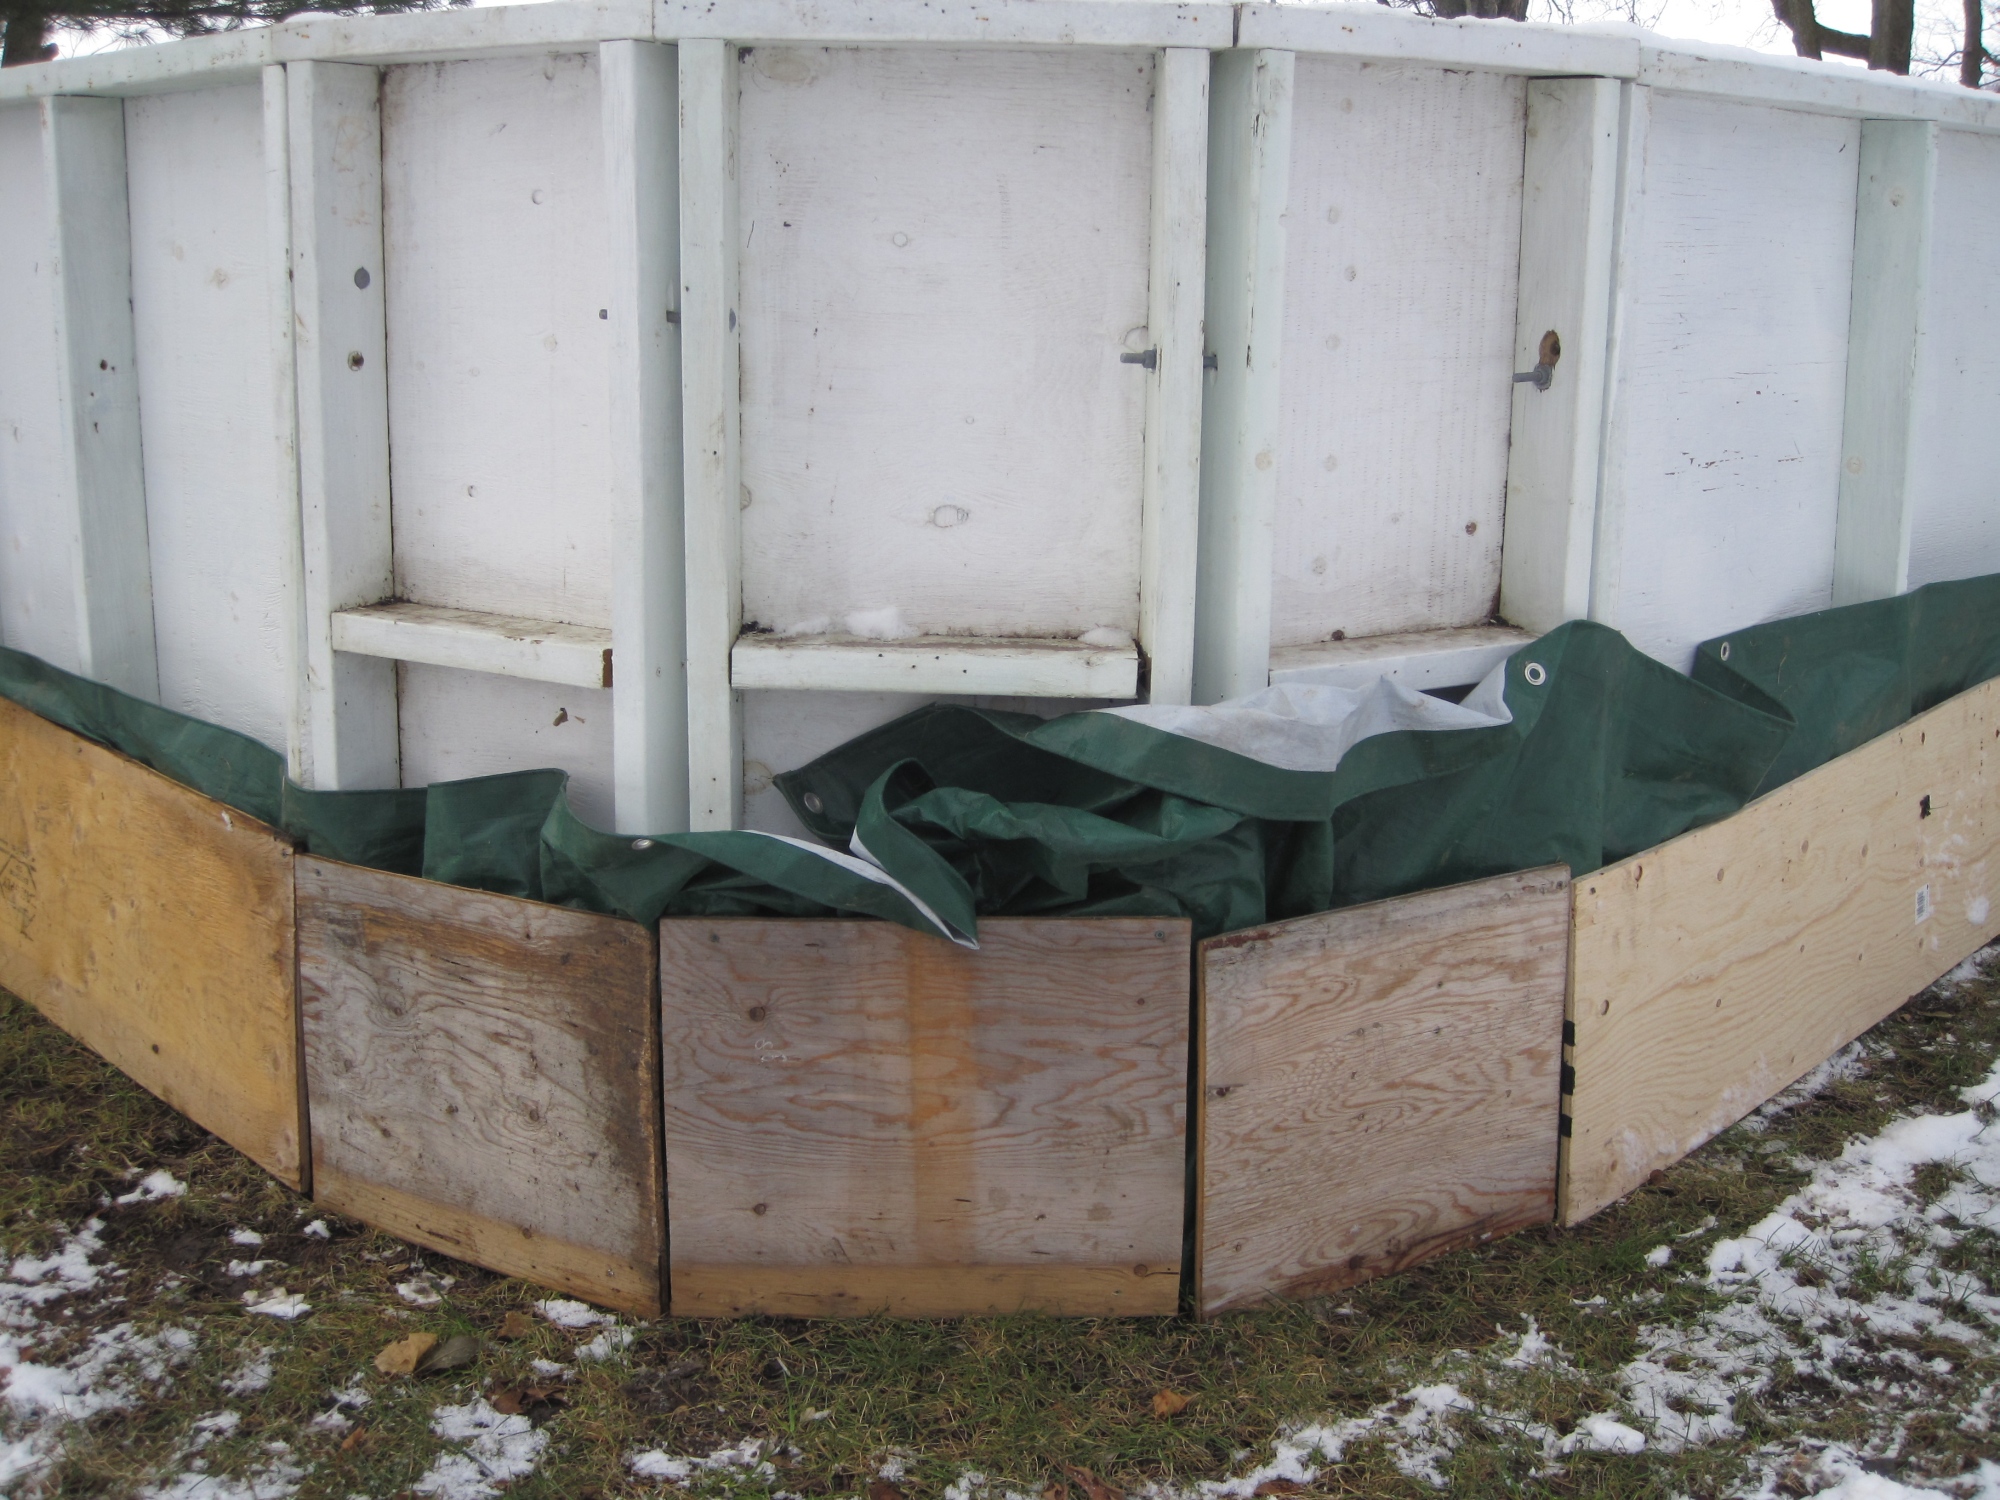
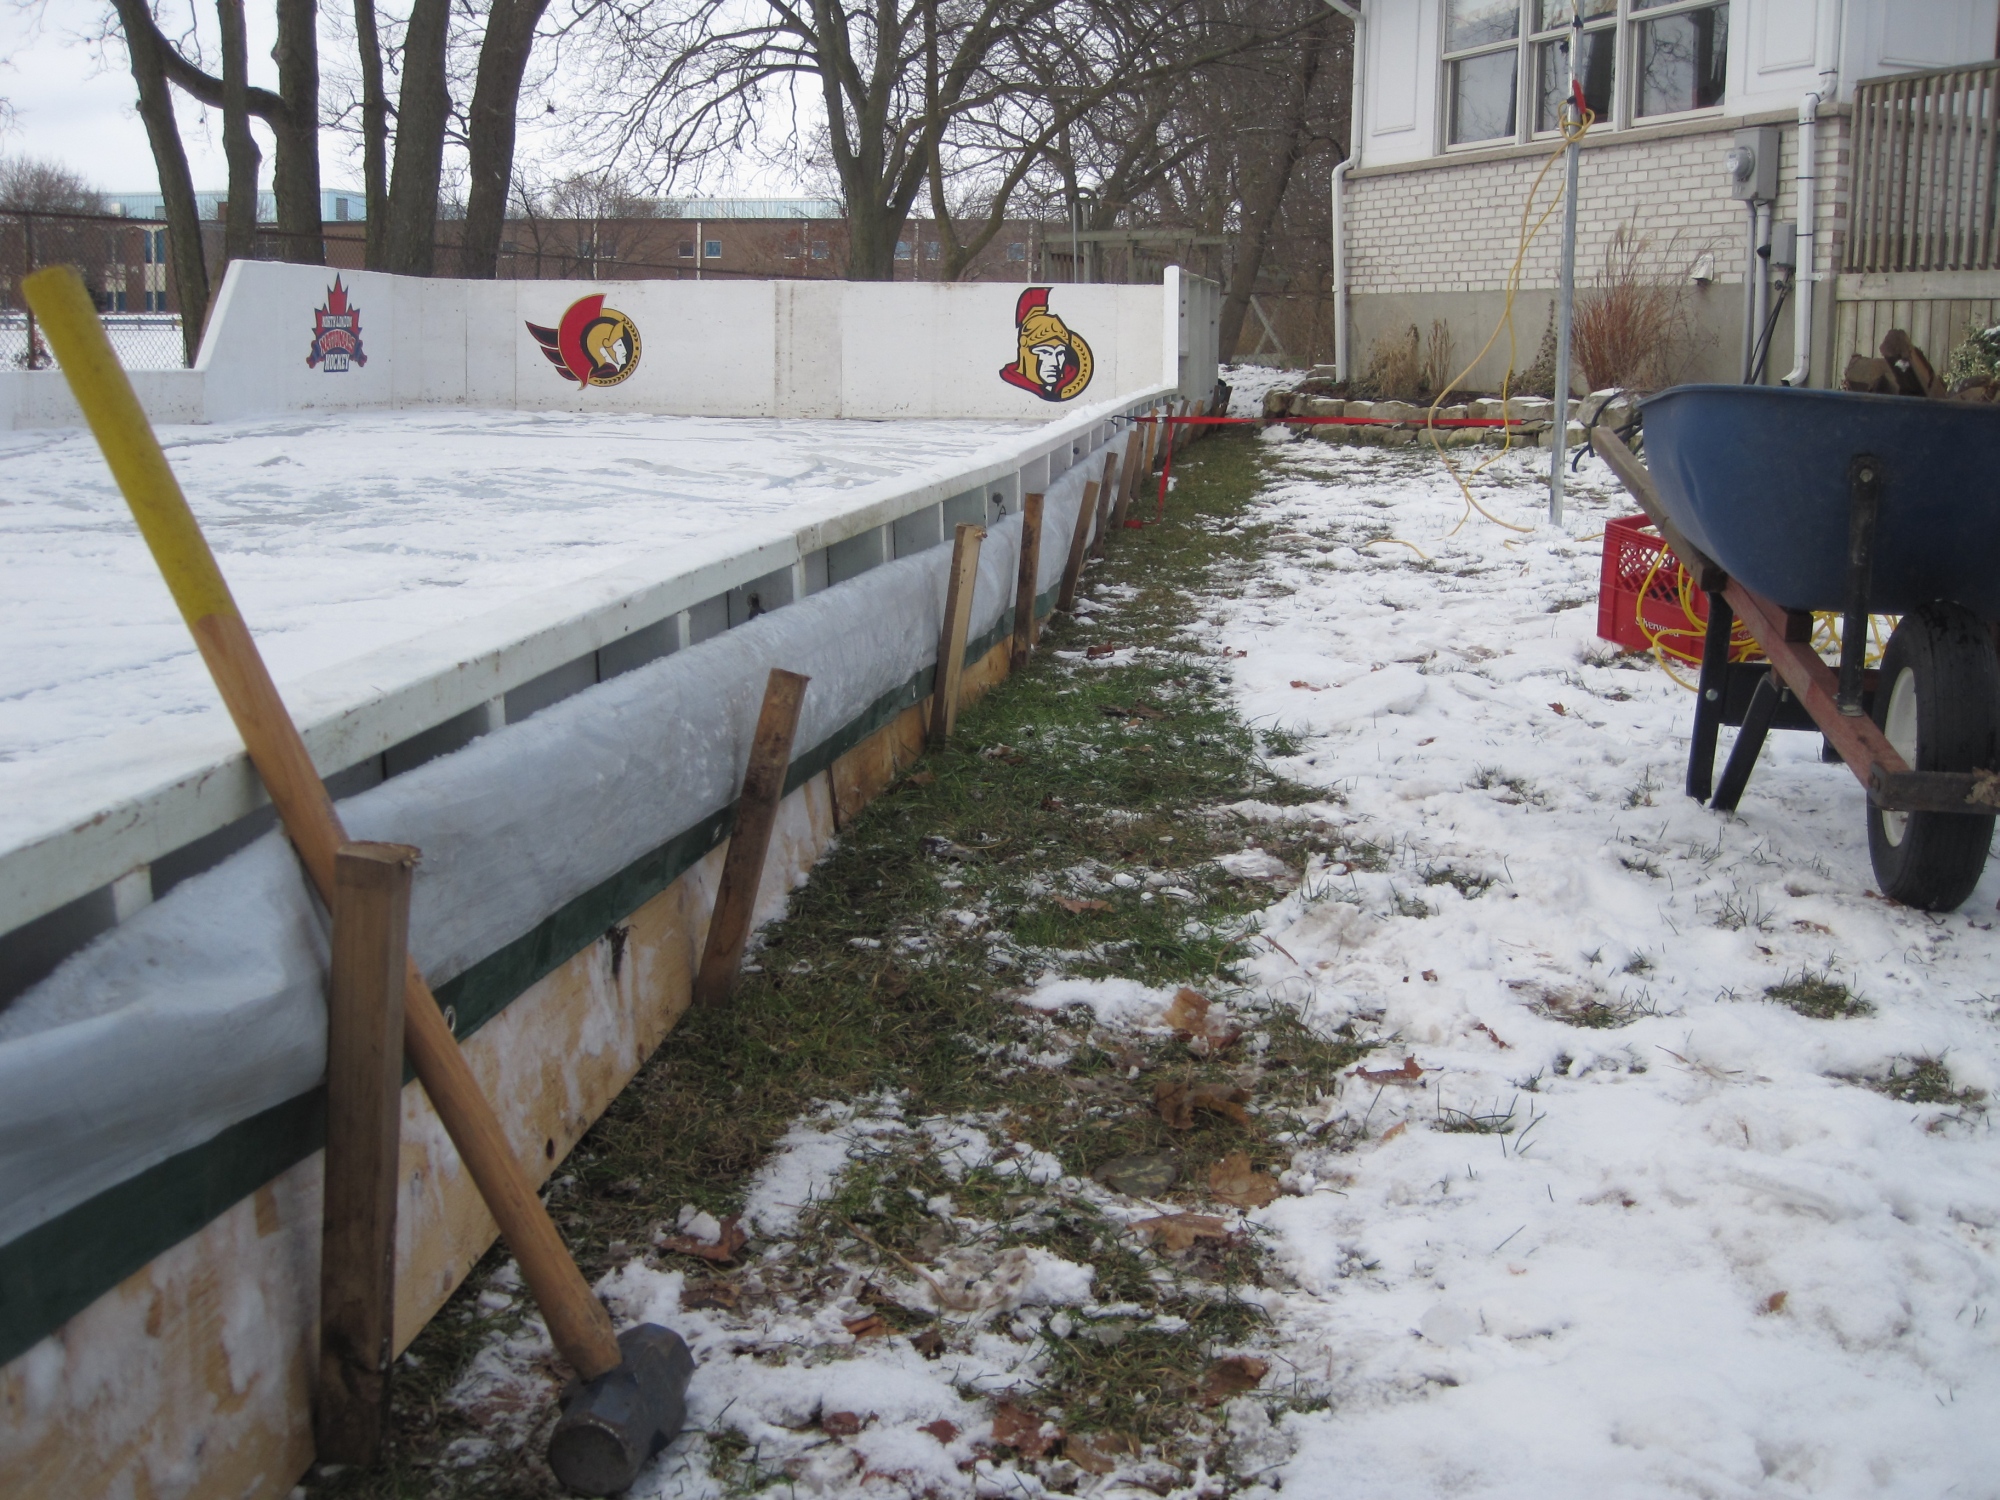
How to install a liner on the outside 2008-9 update (Figures 15-19, Movie 2)
One of the main problems with making boards is what to do with your liner. Most seem to put their liner on the inside, like putting a filter inside your coffee maker. The problem with that method is that 1) the liner bunches in the rounded corners (and squared ones too) and 2) the liner gets destroyed by skates, shovels etc. These liner-on-the-inside problems can be solved relatively easily with a kickplate - about 8" or so high of thin plywood that sandwiches the liner against the boards (See Figure 20) . The reason most people do not put the liner on the outside is the fear that the boards will rot. We have not experienced this - see figures 17 and 19 - what things look like after 4 years of use. A big advantage of having the liner on the outside is that your boards freeze into the ice making them very sturdy - which is important if older kids and adults will be knocking against your boards. So we put our liner down first, put the boards on TOP, then wrapped the liner around the outside (Figure 15-19). However, this adds the need to support the liner on the outside, so we cut a bunch of plywood boards 12" high that we staked around the outside - same amount of work as the kickplates. Works fantastic (Movie 2).
|
|
Click image to see large version. |
|||
| Figure
19 ready to fill! |
Figure
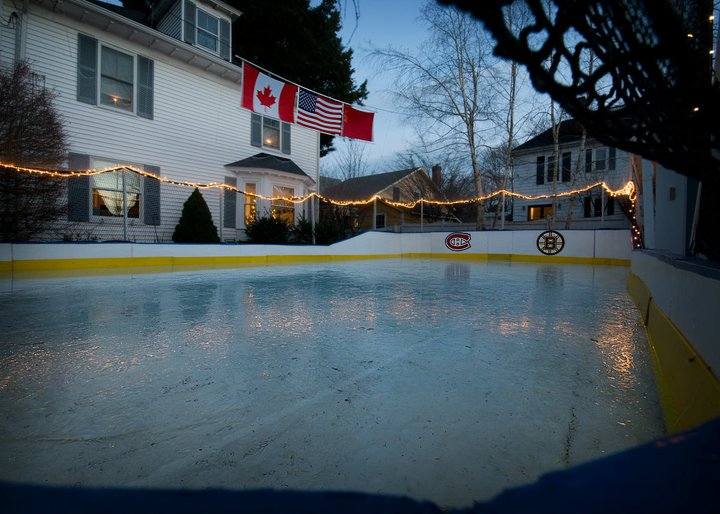
20 MA rink takes to the next level! |
Paying attention to the details... (Figure 20)
Of course if you want the full arena feel, why not paint your kickplate (1/4" X 12" plywood with two coats of enamel paint), paint a blue cap on top of the boards, add some hockey netting to protect your windows, and why not some flags depicting some classic hockey rivalries? This is a photo of a rink in Massachusetts that builds on the ideas above. You can see they use the traditional liner on the inside method. There are rumours of lighted olympic rings coming soon to that rink! Very nice.
make your own hockey shooter tutor with beacon light | make your own curling stones | make your own soccer goal | build your own ice flooder | site that inspired us (esp. Eitel design) rink making forum | email us
*Canadian dollars